

Table of Contents
ToggleWhat is the meaning of Slowly Changing Dimension (SCD) type-1?
In SCD Type 1, when a change occurs in a dimension attribute, the existing data in the data warehouse is simply overwritten with the new value. Historical data is not preserved, and only the latest information is kept.
Key Points to be remembered while implementing SCD Type-1 Mapping in Informatica CLOUD.
- Detecting New Records: Identify new records and insert them into the target system to ensure the inclusion of fresh data.
- Updating Existing Records: Identify existing records and update them with the latest data if changes are detected, maintaining data accuracy and currency.
- Handling Unchanged Records: Identify unchanged records and handle them appropriately, such as excluding them from mapping or processing to optimize data flow and reduce redundancy.
Source and Target Object Setup for Implementation of SCD-2 Mapping In Informatica CLOUD.
For explaining SCD Type-1 Lets take a sample Flat file students.txt which provides Students Information.

The Students data should be loaded into Target Dim_Students table. Table Structure will be as follows.
CREATE TABLE Dim_students
   (
    Student_ket        Number(6,0),
    Student_Id         Number(6,0),
    Student_Name       Varchar2(20),
    Student_fee        Number(8,2),
    Dept_Id            Number(4,0),
    Checksum           Varchar2(50)
    )
;
Student_key: This is a temp sequence which will always increase by 1 for each and every new record inserted in to the table.
Checksum: This is value which is unique. This will be representing the data in the form of a hex/Sequence. For any change in data this value will change and helps in identifying the changes in the data. (Example we can use MD5 function for calculating the checksum)
Here are the Steps to Create SCD Type-1 Mapping In Informatica Cloud.
Please Observe the Below Mapping which will show the Implementation of SCD Type-1 using Informatica Cloud.
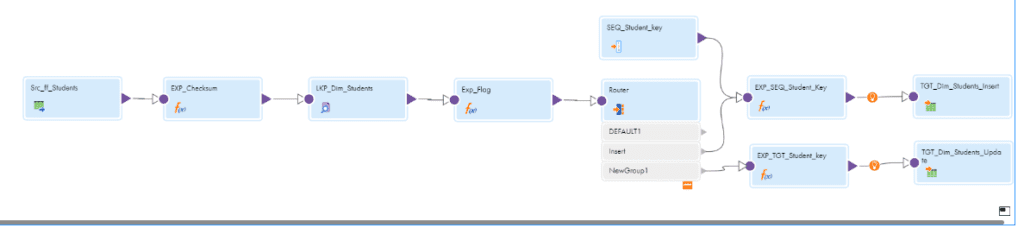
By Following the Below Steps we can Implement SCD TYPE-1 Mapping in INF Cloud.
Step:1 Selecting the Source Objects.
In source transformation, choose “Students.txt” as the source item. In Formatting Options, designate the delimiter and other properties relevant to flat files. Confirm that the source fields are correctly interpreted in the Fields section.

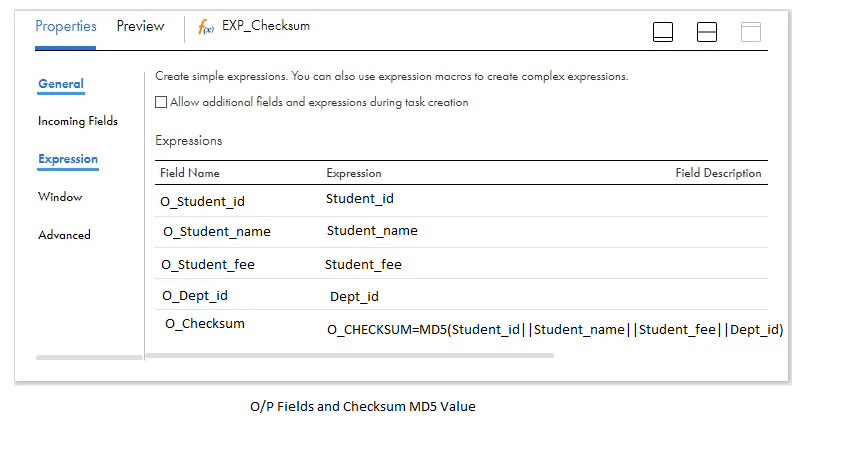
Step:2 Creating Output Fields.
Transfer the data from the source transformation to the expression transformation. All fields retrieved from the flat file will initially be treated as strings. These fields need to be converted to the appropriate data types as specified in the target dimension table. Calculate the checksum value using an MD5 function by utilizing the necessary source fields within the expression transformation.
O_CHECKSUM=MD5(Student_id||Student_name||Student_fee||Dept_id)
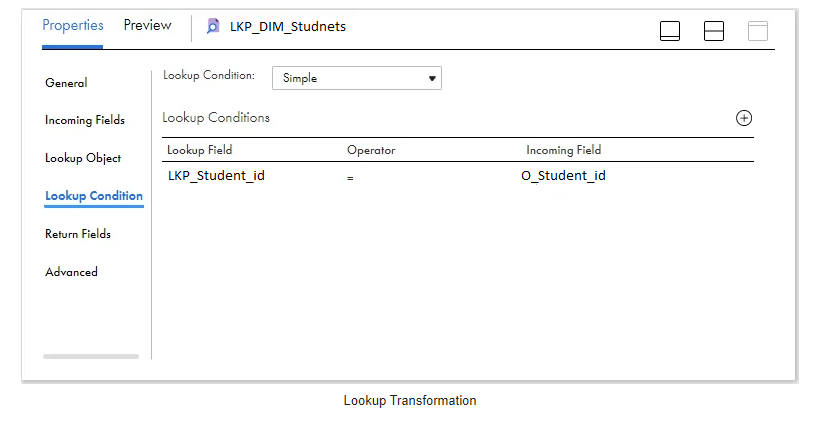
Step-3 Lookup on target based on key.
Transfer the data to the Lookup transformation. Choose the Dim_Employees table as the Lookup object. Alternatively, we can craft a query that reads only the necessary fields from the table, as demonstrated below.
SELECT
Students_Key AS Lkp_Student_Key ,
Students_name_Id AS Lkp_Student_Id ,
Checksum AS Lkp_Checksum
FROM Dim_Students;
In the Lookup Condition tab, choose the condition based on the employee ID fields from both the source and lookup objects, as illustrated below.
Step-1 Flag the data according to the output retrieved from the Lookup transformation.
Based on the output obtained from the lookup transformation, the data should be marked either for insertion or update.
1. If there is no matching record found for the employee ID read from the source in the lookup object, mark the record for insertion.
2. If there is a matching record found for the employee ID read from the source in the lookup object and the data has changed, label the record for update.
3. If there is a matching record found for the employee ID read from the source in the lookup object and the data remains unchanged, disregard it.
Transfer the data from the Lookup transformation to an Expression transformation. Create an output field called “Flag” and assign the following expression to flag the records:
IIF( ISNULL( Lkp_Student_Key ), ‘I’,
IIF( O_Checksum != Lkp_Checksum, ‘U’ ))
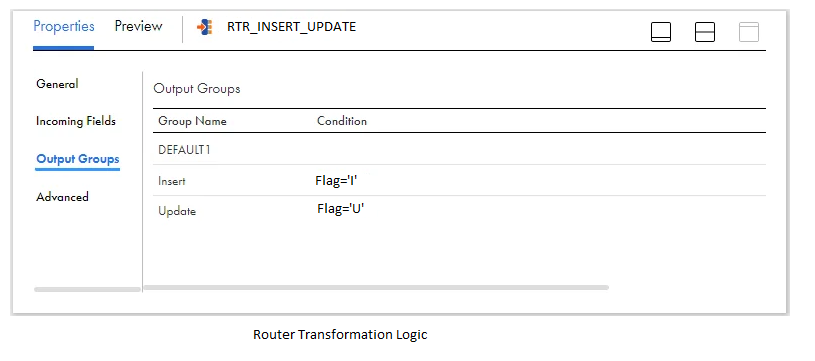
Step: 5 Direct the data to various targets depending on the flag value.
Establish two output groups within the Router transformation to channel the data to distinct targets based on the flag value for insertion (Flag=’I’) and update (Flag=’U’) operations, as depicted below.
Direct the data to two separate expression transformations from each of the output groups before mapping it to the target.
Ste:6 Set up the Sequence Generator to produce surrogate keys.
Utilize a Sequence Generator transformation to generate surrogate keys for the target dimension table. Transfer the data from the Sequence Generator to the expression transformation connected to the Insert group of the Router transformation.
- Generate an output field named O_Student_KEY with a data type of bigint, and set its value to the NEXTVAL obtained from the sequence generator.
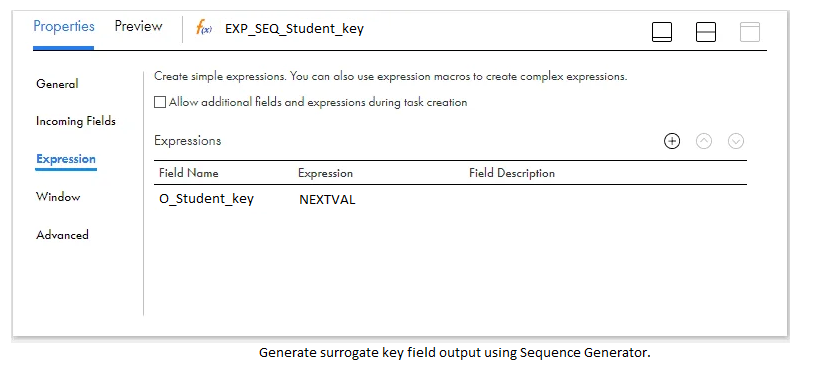
If surrogate key value generation is managed at the database level, employing the Sequence Generator transformation is unnecessary.
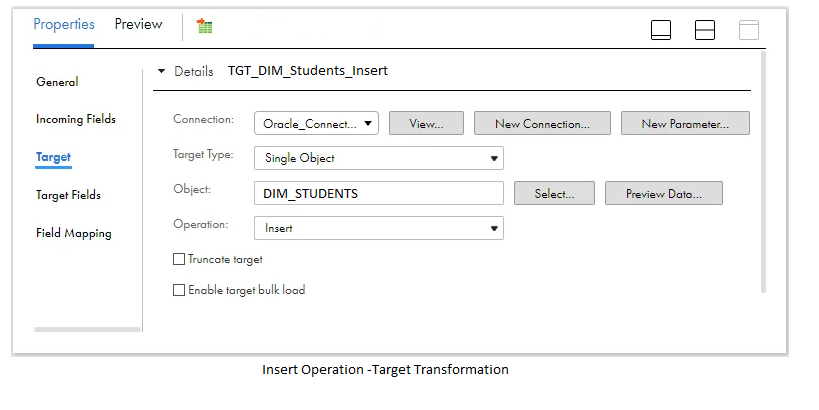
Step:7 Set up target for insertion operations.
Transfer the data from the expression transformation to a target transformation. Choose the dimension table Dim_Students as the target object, specifying the operation as Insert.
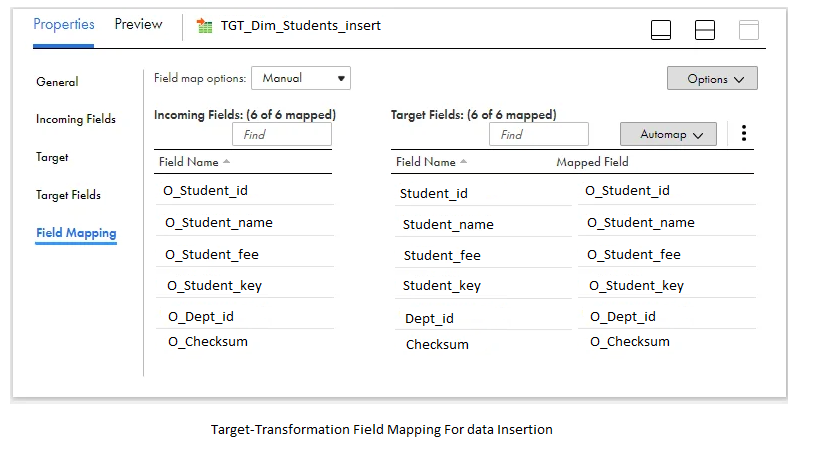
In the Field Mapping section of the target transformation, connect the output fields generated in the mapping to their corresponding target fields.
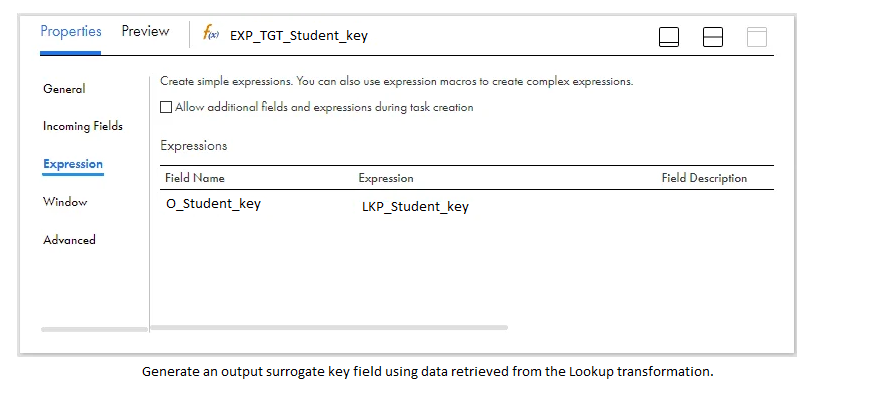
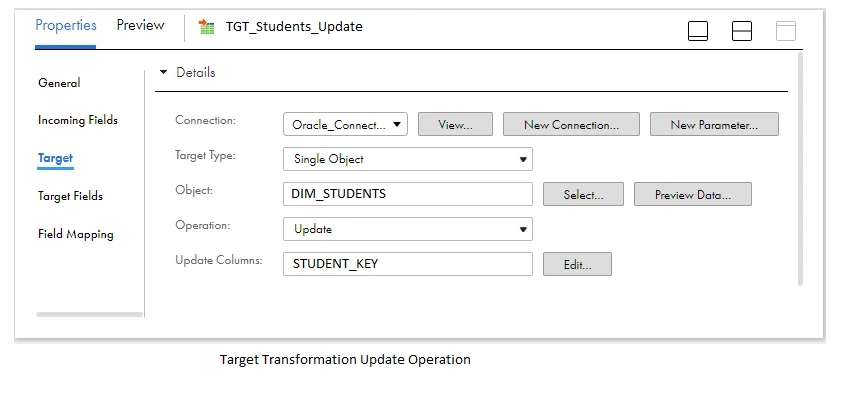
Step:8 Set up target for Update operations.
Route the data from the Update group of the router transformation to an expression transformation.
Generate an output field named O_Student_KEY and set its value to the LKP_Student_KEY field retrieved from the lookup. This field serves to identify the existing record in the dimension table for updating the record information.
Transfer the data from the expression transformation to a target transformation. Choose the dimension table Dim_Student as the target object, specifying the operation as Update. Select Student_KEY as the Update column. This column is used to identify the record in the target table and perform the update operation.
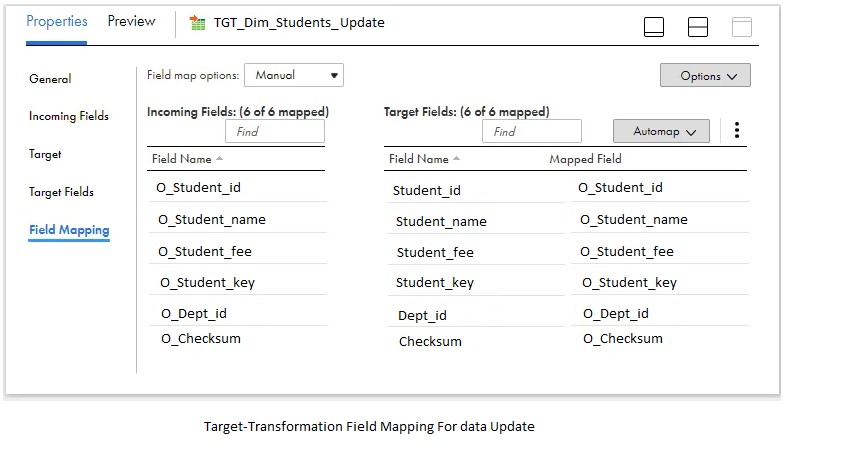
In the Field Mapping section of the target transformation, connect the output fields generated in the mapping to their corresponding target fields.
Verify, save, and execute the mapping.
Checking the data in the dimension table after the initial execution.
The data in the Dim_students table following the processing of the source data appears as follows.

As there is no existing data in the dimension table during the initial execution, both records are marked for insertion, and the data is inserted.
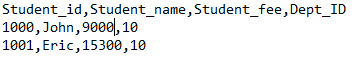
Checking the data in the dimension table after the second run with modified source data.
Suppose the fee of the student with ID 1000 has been adjusted from 15000 to 9000, while the data for other students remains unaltered.
Following the data processing by Informatica, the dimension table contains the following data.

The salary information for the Student with ID 1000 has been updated to 9000. However, the information for the Student with ID 1001 remains unchanged, as there have been no alterations to the data.
Summary
Please adhere to the following best practices while developing the mapping:
1. Ensure proper naming conventions are followed for transformations and fields. For example, prefix all output fields in the mapping with ‘O_’ and lookup fields with ‘LKP_’.
2. If multiple fields in the dimension table require tracking changes in data, consider including a checksum field in the table. This facilitates easy tracking of data changes.
3. In the target transformation, restrict incoming fields by selecting only those prefixed with ‘O_’ using Field Rules. This streamlines the field mapping process and facilitates the use of the Automap feature by allowing only required fields into the target.
FAQ's
SCD-1 in Informatica Cloud refers to Slowly Changing Dimension Type 1, where existing dimension data is updated with new values without preserving historical changes. It involves overwriting current data with the latest information during ETL processes, suitable for scenarios where historical tracking is not required.
SCD Type 1, or Slowly Changing Dimension Type 1, involves updating existing dimension data with new values without retaining historical changes. For example, in a customer database, if a customer’s address changes, the old address is replaced with the new address without keeping a record of the previous address.
Slowly Changing Dimension